 how-to
How to Measure Windows for Custom Blinds
Last Updated: October 23, 2026
Quick Summary
How to measure windows for custom blinds requires taking multiple measurements at different points to catch irregularities, then rounding to the nearest 1/8 inch and submitting either exact or adjusted measurements depending on the product's requirements. For inside mount, measure width at top, middle, and bottom, then height at left, center, and right, using the smallest width and longest height; for outside mount, measure the area you want to cover including 3-5 inches of overlap on each side.
- Use a steel tape measure at least 25 feet long, a level, and a notepad to record measurements immediately as you take them.
- Inside-mount blinds need at least 2 inches of flat frame depth; outside-mount blinds work for shallow frames, arched windows, or when inside mount won't fit.
- Round inside-mount measurements down to the nearest 1/8 inch to ensure clearance; round outside-mount measurements up to maintain coverage.
- Check for out-of-square windows by measuring both diagonals; a difference over 1/4 inch should be noted for the supplier.
- Photograph obstructions like cranks, handles, radiators, and irregular frame conditions, and confirm whether the product requires exact or adjusted measurements before ordering.
Table of Contents
- Inside-Mount vs. Outside-Mount: Understanding Your Measurement Approach
- Tools for Measuring Windows for Blinds
- How to Measure for Inside-Mount Blinds
- How to Measure for Outside-Mount Blinds
- Handling Obstructions and Irregular Windows
- Blind Measurement Mistakes to Avoid
- Recording and Rounding Your Measurements
- Frequently Asked Questions
Inside-Mount vs. Outside-Mount: Understanding Your Measurement Approach
First decide whether you'll mount inside or outside the window frame, this determines how to measure windows for custom blinds and how they fit.
When to Measure for Inside-Mount Blinds
Inside-mount blinds nest into the opening for a clean look and maximum light control. Measure for inside mount when your frame is at least 2 inches deep and handles, cranks, or trim won't interfere.
When to Measure for Outside-Mount Blinds
Outside-mount blinds cover the frame and extend onto the wall, ideal for shallow frames, arched windows, or where inside mount won't fit.
Choose outside mount if your frame is under 2 inches deep or protruding handles and cranks block the opening; it also covers frame gaps that leak air.
Tools for Measuring Windows for Blinds
A level catches windows that aren't square or plumb early; a 2-foot level works for most windows.
Keep a notepad and pen nearby and record each measurement as you take it, don't rely on memory.
Optional: a helper to hold the tape, a pencil to mark points, and a flashlight for deep frames.
How to Measure for Inside-Mount Blinds
Learning how to measure windows for custom blinds requires precision: measure width and height at multiple points to catch irregularities.
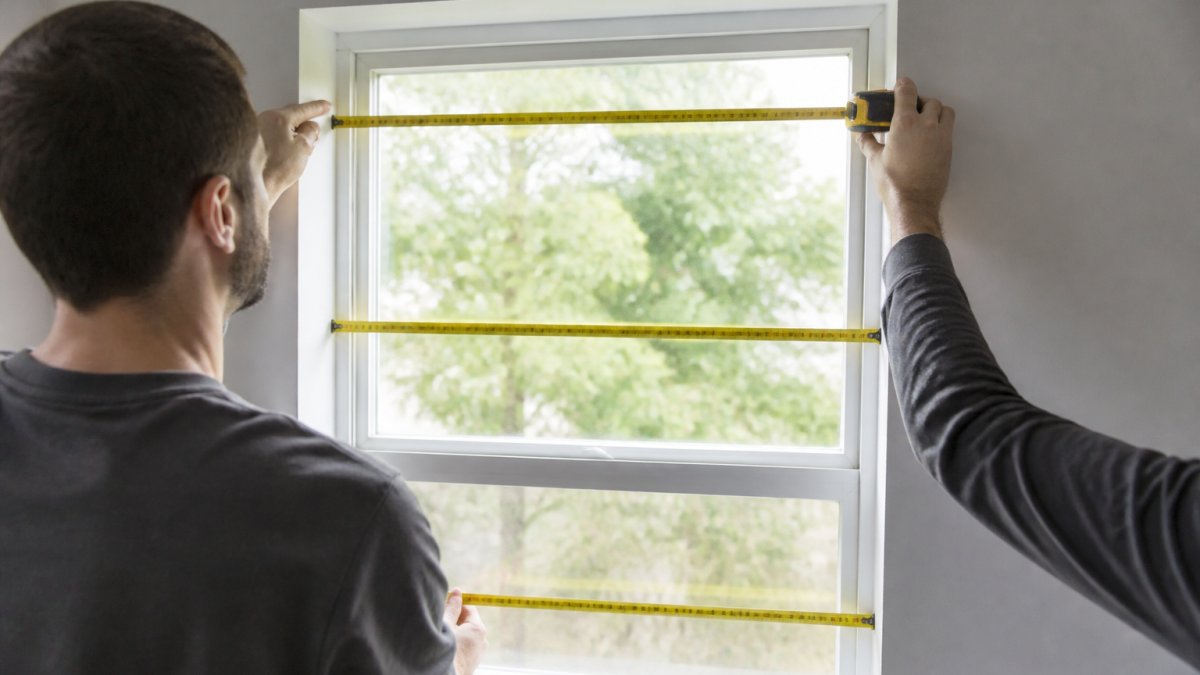
Measuring Width for Inside Mount
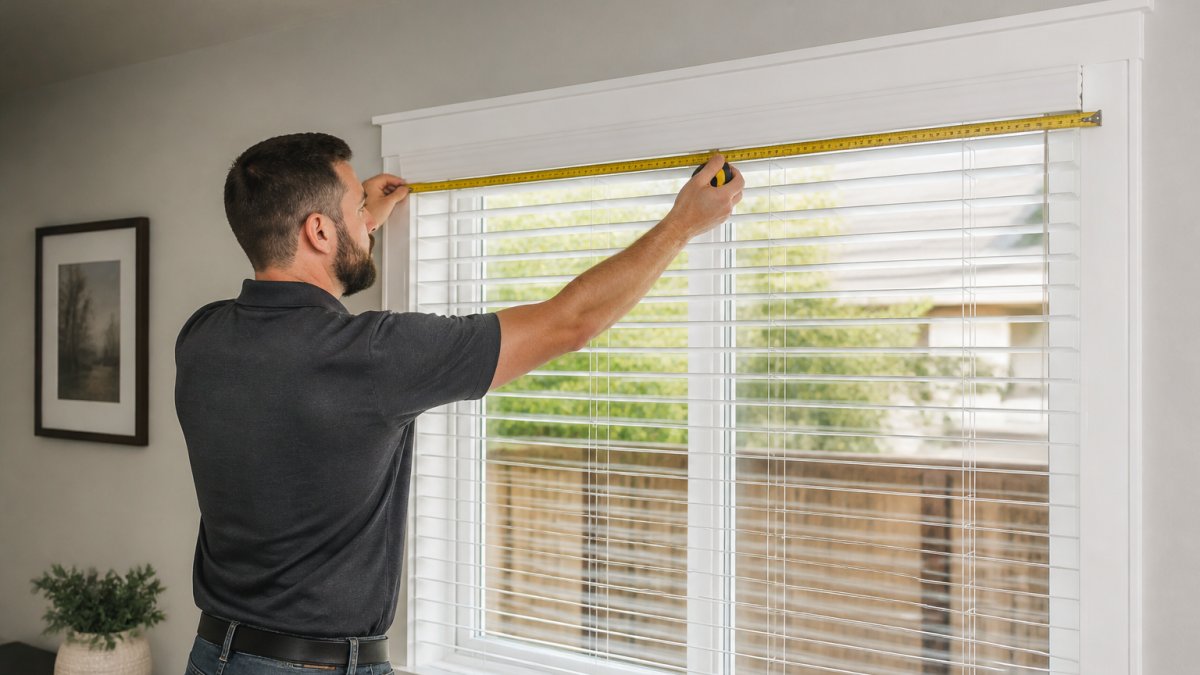
Take three width measurements: top, middle, and bottom.
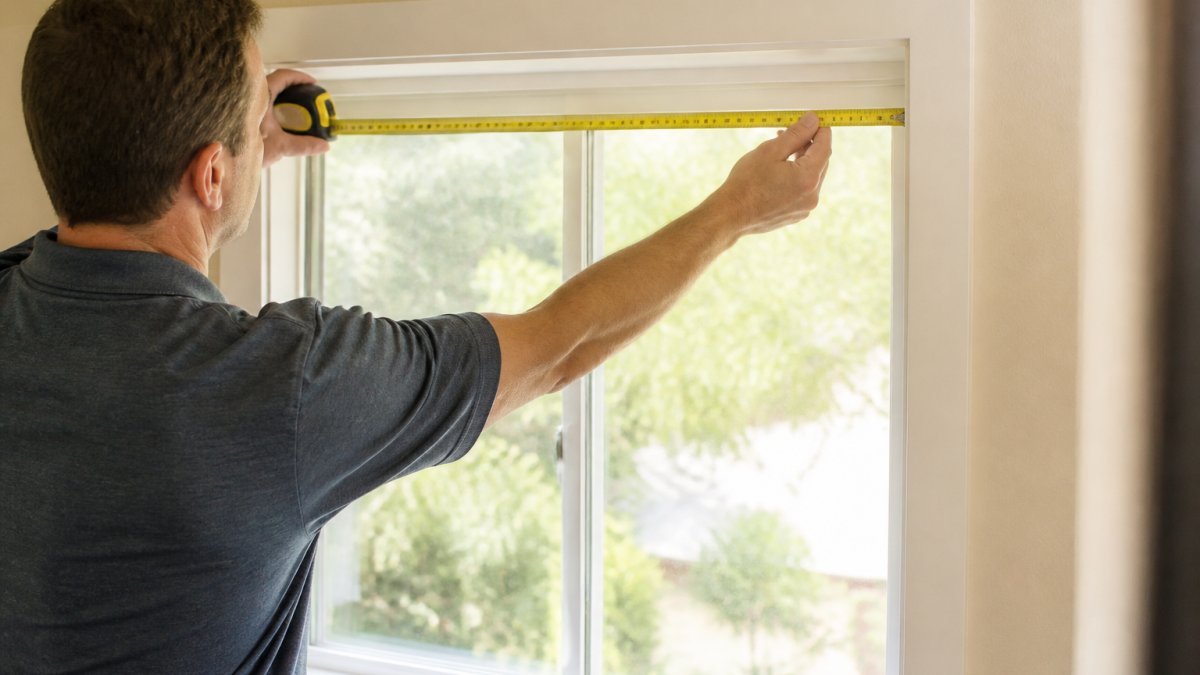
Step 1: Measure at the top. Hold the tape horizontally across the top of the inside frame and record it.
Step 2: Measure at the middle. Measure horizontally halfway down the opening and record it.
Step 3: Measure at the bottom. Measure horizontally just above the sill and record it.
Step 4: Choose the smallest width so the blinds fit without binding.
Measuring Height for Inside Mount
Take three height measurements: left, center, and right.
Step 2: Measure in the center. Measure vertically from top to bottom and record it.
Step 3: Measure on the right. Measure vertically along the right edge and record it.
Step 4: Choose the longest height to prevent gaps at the top or sides, and note any variation over 1/8 inch.
Checking for Square Windows
Most windows aren't perfectly square, but checking matters for fit.
Measure diagonally from top-left to bottom-right, then top-right to bottom-left. Equal diagonals mean square; a difference over 1/4 inch means out of square.
Tell your supplier about out-of-square windows when you order, they may adjust the design or recommend specific mounting hardware.
How to Measure for Outside-Mount Blinds
Outside-mount measurements are simpler: you're measuring the area to cover, not fitting into an opening.
Measuring Width for Outside Mount
For outside mount, the blinds should cover the entire window and extend onto the wall.
Step 2: Measure edge to edge horizontally from the intended left edge to the right edge, including overlap on both sides.
Step 3: Record one measurement. Unlike inside mount, outside mount needs only one width reading since you're measuring to points on the wall.
Measuring Height for Outside Mount
Step 2: Ensure adequate coverage over the entire window and onto the wall enough to block light leaks.
Step 3: Account for the headrail. Measure to where you want the blind itself to start, not where the headrail begins; your supplier accounts for headrail depth.
Handling Obstructions and Irregular Windows
Real windows rarely fit textbook descriptions. Handles, cranks, trim, radiators, and irregular shapes complicate measurements, and these are where a wrong order costs the most.
Build an Obstruction Checklist Before You Measure
Check each at the window; any "yes" changes your mount choice or measurement points.
- Crank or casement handle: Measure how far it protrudes past the interior face of the frame. More than about 1 inch into the opening means inside mount will interfere with operation.
- Window locks and sash lifts: These sit on the sash face and can block a flush inside-mount headrail. Note their height above the sill.
- Interior trim and casing: Measure width and projection from the wall. Outside-mount brackets need a flat surface; deep crown-style casing can push the blind out.
Clearance Math for Inside Mount
Inside mount only works when the blind has room to operate. Use these rules of thumb, then confirm against the product's specification sheet, every manufacturer publishes a minimum inside-mount depth.
- Minimum depth: Most inside-mount blinds need at least 2 inches of flat frame depth for a flush install. Cellular and roller shades often need less; wood and faux-wood blinds with a valance need more.
- Flush vs. semi-flush: Flush sets the headrail even with the wall or trim; semi-flush leaves it projecting slightly. If depth is short, ask about a semi-flush bracket.
- Obstruction clearance: Subtract the obstruction's protrusion from available depth. Below the product minimum, switch to outside mount or a low-profile headrail.
Measuring Arched, Angled, and Specialty Shapes
Standard rectangular blinds don't fit arched or angled openings, but the measurements you collect determine what a fabricator can build.
Arched windows (half-round, full-round, eyebrow):
- Measure the width at the widest point, usually the spring line at the bottom of the arch.
- Measure the height at the center from the spring line to the peak.
- Measure the height at each side where the arch meets the jamb; on a true half-round these are zero, but on an eyebrow or segmental arch they are not.
- Measure the radius if you can: width divided by two gives the radius of a true half-round. Note whether the arch is a true semicircle or a segment.
- Photograph the arch straight-on with the tape visible, and note frame depth at the spring line and at the peak.
Fabricators build arched blinds as fixed or operable specialty units, sometimes in a fan or radial configuration.
Angled and trapezoidal windows (attic, gable, stairwell):
- Measure all four sides, not just width and height.
- Measure both diagonals to confirm the shape and check for square.
- Measure frame depth at the top and bottom, it often varies on a sloped ceiling.
- Note the angle of the sloped side, or photograph the window with a level in frame so the supplier can read the pitch.
Specialty polygons (hexagon, octagon, triangle): Measure every side and diagonal and photograph the window straight-on.
Measuring When There Is No Sill or the Frame Is Irregular
Older homes, replacement windows, and storm-window combinations often lack a clean sill or uniform frame. Work from the actual mounting surfaces.
- No sill: Measure height from the top of the opening to the bottom of the glass or the lowest flat mounting surface, whichever the product requires. Note which point you used.
- Irregular or damaged frame: Inside mount needs a flat, solid surface for brackets. If the jamb is damaged, out of plane, or covered by a storm frame, outside mount is usually safer because brackets attach to the wall.
- Replacement windows with a flush interior: The new frame may sit proud of the original wall. Measure from the interior face of the new frame to the wall, that's the real inside-mount depth.
Quick Decision Rule
If any obstruction protrudes more than about 1 inch into the opening, or available inside-mount depth falls below the product's published minimum, choose outside mount. Arched, angled, or specialty polygon windows are custom orders, supply full dimensions plus photos. When in doubt, send measurements and photos to the supplier before ordering; a five-minute review is cheaper than a non-returnable remake.
Blind Measurement Mistakes to Avoid
Common errors lead to blinds that don't fit or operate poorly.
Measuring only once. Windows vary.
Ignoring obstructions. A crank handle or radiator seems minor until the blind won't close.
Measuring to the wrong points. Inside mount: measure the actual opening, not the frame edge.
Recording measurements wrong. Write down numbers immediately, a notepad or phone, as you take each one. Check our Frequently Asked Questions for answers to common measurement questions.
Assuming all windows are the same. In a multi-window room, measure each window separately.
Recording and Rounding Your Measurements
Proper recording and rounding prevent costly mistakes, but the bigger question most guides skip is what number you actually submit. Manufacturers differ on whether they want your exact opening measurement or a pre-adjusted one, and getting this wrong is the most common reason a custom blind arrives the wrong size.
Record Every Reading, Labeled
Write down each measurement as you take it, labeled with what and where: "Top width," "Middle width," "Bottom width," "Left height," "Center height," "Right height," "Diagonal 1," "Diagonal 2." Include the room name and a window ID ("Living room - Window A") so multi-window orders don't get mixed up.
Create a simple table for your records:
| Measurement | Location | Value |
|---|---|---|
| Width | Top | 36 1/8" |
| Width | Middle | 36" |
| Width | Bottom | 35 7/8" |
| Height | Left | 48" |
| Height | Center | 48 1/8" |
| Height | Right | 48" |
| Diagonal | Top-left to bottom-right | 60 1/4" |
| Diagonal | Top-right to bottom-left | 60 1/4" |
This format makes it easy to spot variations and out-of-square conditions. Share the table with your supplier when you order.
Round to the Nearest 1/8 Inch, and Know Which Way
Blind manufacturers build in 1/8-inch increments. Convert every reading to the nearest 1/8 inch and follow the direction rule for your mount type:
- Inside mount: Round down to the nearest 1/8 inch, rounding up removes clearance and can cause binding. If your smallest width is 35 7/8", submit 35 7/8", not 36".
- Outside mount: Round up to the nearest 1/8 inch so you don't lose coverage. If your width is 40 1/16", submit 40 1/8".
- Height, inside mount: Use the longest of your three height readings, then round down to the nearest 1/8 inch to avoid a gap at the sill.
Exact vs. Adjusted: The Deduction Question
This step separates a blind that fits from one that doesn't. Manufacturers fall into two camps, and the product's measuring instructions tell you which applies:
- Submit exact opening measurements. The factory applies its own deduction (a "factory deduction" or "manufacturer deduction") for brackets, headrail, and clearance. You send the raw opening size; the factory does the math.
- Submit adjusted measurements. You subtract the deduction yourself before ordering. The instructions state it, for example, "subtract 1/4 inch from the width for inside mount", and you submit the reduced number.
How to tell which applies: Read the product's measuring guide where you order. Look for "we will make the necessary deductions," "do not subtract," or "subtract X inches." If it's silent, message the supplier before ordering and get the answer in writing.
Common deduction patterns (confirm against your product's guide, do not assume):
- Inside-mount width deductions often fall in the 1/8" to 1/2" range for bracket clearance and headrail end caps.
- Inside-mount height deductions vary more widely and depend on whether the product has a valance or cassette.
- Outside-mount orders usually take the exact measurement with no deduction, but some products add a headrail return or side channel that affects finished width.
Product-Specific Fit Rules to Confirm
Deductions aren't the only product-specific rule. Confirm these for the exact product you're buying:
- Minimum and maximum widths: Every product has a build range. A window outside it may need a different product or a split-headrail configuration.
- Headrail and valance projection: A valance or cassette projects forward. On inside mount, confirm it fits within your frame depth; on outside mount, confirm it clears obstructions.
- Side channels and light blockers: These add width and require a flat mounting surface, changing both the measurement and the mount choice.
Final Check Before You Submit
Run this checklist against your table:
- Every reading is converted to the nearest 1/8 inch and rounded in the correct direction for the mount type.
- The width you're submitting is the smallest inside-mount width (or your intended outside-mount coverage).
- The height you're submitting is the longest inside-mount height (or your intended outside-mount coverage).
- You've noted any out-of-square condition (diagonals differing by more than 1/4 inch) and flagged it to the supplier.
- You've confirmed exact-vs-adjusted submission and the stated deduction in writing.
- You've confirmed the product's minimum/maximum build range and any clearance requirements for the lift system.
- You've saved photos of the window and any obstructions alongside your measurement table.
At Towersunitedblinds, we help customers measure accurately and select the right blinds for their windows. Once your measurements are confirmed and ready, discover the perfect window coverings for your home. We catch measurement errors that could lead to poor fit or wasted money. Proper measurement techniques ensure custom fit success
Frequently Asked Questions
How do I measure a window for inside-mount blinds?
For inside-mount blinds, measure the width at the top, middle, and bottom of the window opening. Record the smallest width measurement. Then measure the height from the top of the opening to the sill at the left, center, and right. Use the longest height measurement. Round both to the nearest 1/8 inch. Inside-mount blinds fit inside the window frame, so accurate measurements prevent light gaps and ensure a clean fit.
How do I measure a window for outside-mount blinds?
For outside-mount blinds, measure the width of the entire window frame plus any wall space where the blinds will sit on either side. Measure the height from above the window frame to below the sill, or to where you want the blinds to end. Take measurements at three points (top, middle, bottom for width; left, center, right for height) and use the longest width and height readings. Round to the nearest 1/8 inch. Outside-mount blinds cover the frame completely, maximizing light control.
What tools do I need to measure windows for blinds?
A steel tape measure (at least 25 feet long) is essential for accuracy. A level helps you check if your window frame is square. A notepad and pen allow you to record measurements immediately. For difficult-to-reach windows, a ladder ensures safe access. A smartphone camera can document measurements, but never rely on it as your primary measuring tool. Avoid cloth measuring tapes, which stretch and give inaccurate readings.
What are common blind measurement mistakes to avoid?
Never measure only once or at a single point, windows are often out of square. Don't measure from the outside of the frame; measure the actual opening or frame edge where blinds will mount. Avoid rounding up; always round down to the nearest 1/8 inch to prevent blinds from being too large. Don't forget to account for obstructions like window handles or radiators. Finally, don't assume all windows are the same size; measure each one individually, even in the same room.